How to Grow Thyme: Complete Guide to Planting & Care
Master the art of growing thyme with expert tips on planting, care, harvesting, and using this versatile culinary herb

Thyme is one of the most beloved and versatile herbs in both the culinary and gardening worlds. This aromatic perennial herb has graced gardens and kitchens for centuries, prized for its distinctive flavor, medicinal properties, and remarkable ability to thrive with minimal care. Whether you’re an experienced gardener or just beginning your herb-growing journey, thyme offers a rewarding and practical addition to any garden space.
Native to the Mediterranean region, thyme has adapted to grow successfully in various climates and conditions. Its compact size, drought tolerance, and evergreen nature make it particularly suitable for container gardening, small urban spaces, and traditional garden beds alike. The herb’s woody stems produce tiny, fragrant leaves that pack an intense flavor, making even a small harvest go a long way in the kitchen.
Growing thyme at home provides not only a constant supply of fresh herbs for cooking but also offers aesthetic benefits with its delicate flowers that attract pollinators. This comprehensive guide will walk you through every aspect of cultivating thyme successfully, from selecting the right variety and preparing your growing space to harvesting and preserving your crop.
Understanding Thyme Varieties
Before diving into the cultivation process, it’s important to understand that thyme comes in numerous varieties, each with unique characteristics and uses.
English thyme
(Thymus vulgaris) stands as the most common culinary variety, featuring a classic woodsy flavor that enhances countless dishes. This variety typically grows between 6 to 12 inches tall and produces small, very fragrant leaves with white to light pinkish-purple flowers in early summer.English thyme is the essential component of the classic French herb blend
Herbes de Provence
and is fundamental to the traditional *bouquet garni*. Its evergreen nature allows for year-round harvesting in milder climates, making it an invaluable kitchen garden staple. The plant creates a lovely, drought-tolerant landscape feature that can serve as a low hedge around herb or vegetable gardens.Other popular varieties include lemon thyme, which offers a citrusy twist perfect for fish dishes and teas, and creeping thyme, which works excellently as ground cover. Caraway thyme provides a unique flavor profile with hints of caraway seed, while woolly thyme offers ornamental value with its fuzzy, gray-green foliage. Each variety shares similar growing requirements while offering distinct flavors and growth habits to suit different gardening needs and culinary preferences.
Climate and Growing Conditions
Thyme demonstrates remarkable adaptability across various climate zones, thriving as a perennial in USDA hardiness zones 5 through 9. In these regions, the plant survives winter temperatures and returns vigorously each spring. Gardeners in colder zones can still enjoy thyme by growing it as an annual or bringing containerized plants indoors during harsh winter months.
The herb’s Mediterranean origins mean it performs best in conditions that mimic its native habitat:
full sun exposure, well-drained soil, and relatively dry conditions
. Thyme requires at least six to eight hours of direct sunlight daily to develop its characteristic robust flavor and essential oils. Insufficient light results in leggy, weak growth and diminished aromatic qualities.Temperature preferences for thyme fall within a comfortable range, with ideal growing temperatures between 68°F and 80°F. The plant tolerates heat exceptionally well once established, making it perfect for sunny garden spots that might prove challenging for more delicate herbs. However, thyme struggles in humid, poorly ventilated conditions where fungal diseases can take hold.
Soil Preparation and Requirements
Success with thyme begins with proper soil preparation. The herb thrives in
slightly alkaline soil with a pH between 6.5 and 7.5
, though it tolerates a wider range. The most critical soil characteristic is excellent drainage—thyme absolutely cannot tolerate waterlogged conditions, which quickly lead to root rot and plant death.To create the ideal growing medium, start with a base of quality potting soil or garden soil and amend it to improve drainage. Mix in coarse sand, perlite, or small gravel to create a lighter, faster-draining substrate. For container growing, a blend of standard potting mix with approximately 30% drainage material works excellently. Adding well-rotted compost or aged manure enriches the soil with nutrients while improving its overall structure and texture.
If your native garden soil is heavy clay, consider creating raised beds or mounds to ensure proper drainage. In such situations, building up the planting area by 6 to 8 inches and incorporating plenty of organic matter and drainage amendments creates an environment where thyme can flourish. Testing your soil pH and adjusting with lime if necessary ensures optimal nutrient availability for your plants.
Starting Thyme from Seed
Growing thyme from seed requires patience but offers the most economical way to establish multiple plants.
Starting seeds indoors 6 to 8 weeks before your average last frost date
gives plants a strong head start. Fill small pots or seed trays with moistened seed-starting mix, creating a fine, level surface for the tiny seeds.Sow thyme seeds by sprinkling groups of 3 seeds every 10 inches across the soil surface. Cover with just ⅛ inch of soil—barely more than a dusting—as thyme seeds need some light exposure to germinate successfully. Gently press the soil to ensure good seed-to-soil contact, which improves germination rates.
Maintain consistent soil moisture by misting daily or covering trays with clear plastic to retain humidity.
Germination typically occurs within 10 to 15 days
when soil temperature remains between 70°F and 80°F. Once seedlings emerge, remove any covering and place them in bright light. When seedlings reach about 1 inch tall, thin to the strongest plant per group, snipping weaker seedlings at soil level rather than pulling them to avoid disturbing roots.For direct outdoor sowing, wait until 1 to 2 weeks after your average last frost date and soil temperature reaches at least 68°F. Direct-sown seeds generally take longer to establish but eliminate transplant shock.
Transplanting and Spacing
When seedlings develop several sets of true leaves and reach 2 to 3 inches tall, they’re ready for transplanting into larger containers or garden beds. This usually occurs 4 to 6 weeks after germination. Harden off indoor-started seedlings by gradually exposing them to outdoor conditions over 7 to 10 days, starting with a few hours of morning sun and progressively increasing exposure time.
Space transplants appropriately to accommodate mature plant size and ensure good air circulation.
Plant thyme seedlings 10 to 12 inches apart
in garden beds, with rows spaced 12 inches apart. This spacing allows each plant room to spread while promoting airflow that helps prevent fungal diseases. When planting, set seedlings at the same depth they were growing in their containers, being careful not to bury stems deeper than the original soil line.For container growing, select pots at least 6 to 8 inches in diameter for single plants, or use larger containers to accommodate multiple plants with proper spacing. Ensure all containers have adequate drainage holes to prevent water accumulation. After transplanting, water gently to settle soil around roots, then allow the soil surface to dry before watering again.
Watering Guidelines
Proper watering represents one of the most crucial aspects of thyme care, yet many gardeners struggle with finding the right balance. As a drought-tolerant Mediterranean herb,
thyme prefers relatively dry conditions once established
. Overwatering causes far more problems than underwatering, frequently leading to root rot, fungal diseases, and plant death.During the establishment phase following planting, water more frequently to help roots develop, keeping soil consistently moist but never soggy. Once plants establish after 4 to 6 weeks, reduce watering significantly. Allow the top inch or two of soil to dry completely between waterings. In garden settings, established thyme often thrives on rainfall alone, requiring supplemental water only during extended dry periods.
The best practice involves watering deeply but infrequently, encouraging roots to grow deeper in search of moisture. This creates stronger, more resilient plants. Water at the soil level rather than overhead to keep foliage dry and reduce disease risk. Container-grown thyme requires more frequent watering than garden plants but should still dry somewhat between waterings. Check soil moisture by inserting your finger an inch deep—if it feels dry, it’s time to water.
Fertilization and Feeding
One of thyme’s most appealing characteristics is its minimal fertilization requirements. In fact,
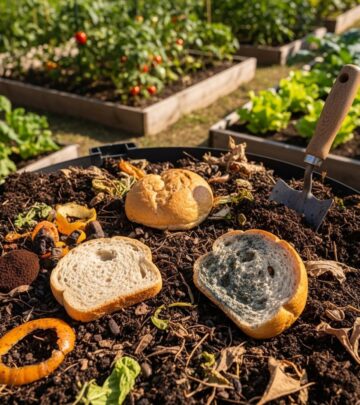
over-fertilizing diminishes the concentration of essential oils that give thyme its distinctive flavor and aroma
. Rich soil produces lush, fast growth but results in bland-tasting leaves with less aromatic intensity.For most situations, incorporating well-rotted compost or aged manure into the soil at planting time provides sufficient nutrition for the entire growing season. If plants show signs of nutrient deficiency—such as pale, yellowing leaves or stunted growth—apply a light feeding of balanced, diluted fertilizer. A half-strength application of a 10-10-10 or similar balanced fertilizer once or twice during the growing season suffices.
Container-grown thyme benefits from slightly more frequent feeding since nutrients leach from pots with regular watering. Apply diluted liquid fertilizer monthly during the active growing season, using half the recommended strength. Avoid high-nitrogen fertilizers that promote excessive leafy growth at the expense of flavor and plant health. Organic options like fish emulsion or compost tea work excellently, providing gentle nutrition without risk of burning plants.
Pruning and Maintenance
**Regular pruning is essential for maintaining healthy, productive thyme plants**. Unlike many herbs where harvesting alone provides sufficient pruning, thyme requires deliberate trimming to prevent it from becoming woody and unproductive. Woody perennial herbs like thyme naturally develop harder, lignified stems as they age, particularly when allowed to grow unchecked.
Trim plants regularly throughout the growing season, removing up to one-third of the plant’s height at a time. This encourages the production of tender, herbaceous stems prized for culinary use while preventing excessive woody growth. Make cuts just above leaf nodes—the points where leaves attach to stems—to promote bushier growth and multiple branching points.
Perform a more substantial pruning in early spring before new growth begins. Cut back woody stems by about one-third, removing dead or damaged growth and shaping the plant. This spring pruning rejuvenates plants and stimulates vigorous new growth. Avoid cutting into old, woody stems without any visible green growth, as these often fail to regenerate.
After flowering, deadhead spent blooms to redirect plant energy into foliage production rather than seed formation. While thyme flowers attract beneficial pollinators and can be left for wildlife value, removing them extends the harvest season and maintains plant vigor.
Harvesting Thyme
Thyme typically reaches harvestable size approximately
three months after planting from seed
, though growth rates vary with growing conditions. For plants started from nursery transplants or cuttings, harvesting can begin sooner, usually within 4 to 6 weeks of planting once plants establish and show active growth.For small amounts of fresh thyme for immediate culinary use, harvest sprigs at any time throughout the growing season. Simply snip or pinch off stem tips, taking care not to remove more than necessary. This ongoing light harvesting actually benefits plants by encouraging branching and bushier growth.
When planning a larger harvest for drying or freezing,
timing is crucial for optimal flavor and plant health
. The best time for major harvests is mid-spring to early summer, just before flower buds develop. At this stage, essential oil concentration peaks, providing maximum flavor and aroma. Never harvest more than half the plant’s total height at any one time, always leaving sufficient green growth to continue photosynthesis and regeneration.For harvesting technique, use clean, sharp scissors or pruning shears to make clean cuts. On younger plants with flexible green stems, cut anywhere along the stem. On older plants with woodier growth, cut just above a leaf node to encourage new branching. If planning to dry thyme by hanging, harvest longer stems and bundle them with rubber bands as you work.
Drying and Preserving Thyme
Preserving your thyme harvest ensures year-round availability of this flavorful herb. Several effective preservation methods maintain thyme’s aromatic qualities and flavor profile.
Air drying
remains the traditional and most popular method. Bundle 5 to 7 stems together, securing with rubber bands that contract as stems shrink during drying. Hang bundles upside down in a warm, dry location with good air circulation, away from direct sunlight. Complete drying takes 3 to 4 weeks.For faster results, oven drying works well. Spread thyme sprigs in a single layer on baking sheets and place in an oven set to its lowest temperature, ideally around 180°F or lower. Leave the oven door slightly ajar to allow moisture to escape. Check frequently and remove when leaves crumble easily from stems, typically within 2 to 4 hours.
Dehydrators offer the most controlled drying environment. Set the temperature to 95°F to 115°F and arrange thyme sprigs on drying racks. Drying time varies from 12 to 24 hours depending on humidity levels and leaf moisture content. Once completely dry, strip leaves from stems and store in airtight containers away from light and heat. Properly dried thyme maintains quality for up to one year.
Freezing provides another excellent preservation option that retains more of thyme’s fresh flavor. Chop fresh thyme leaves and pack into ice cube trays, covering with water or olive oil. Once frozen, transfer cubes to freezer bags for easy portioning. Alternatively, freeze whole sprigs on baking sheets, then transfer to freezer bags once solid.
Common Problems and Solutions
Despite its generally hardy nature, thyme occasionally encounters problems that require attention.
Root rot
ranks as the most common and serious issue, nearly always resulting from overwatering or poorly drained soil. Symptoms include yellowing leaves, wilting despite moist soil, and blackened, mushy roots. Prevention through proper watering and soil drainage is crucial, as root rot proves difficult to cure once established. If caught early, removing affected portions, improving drainage, and drastically reducing water may save plants.**Fungal diseases** like powdery mildew and botrytis can affect thyme, particularly in humid conditions with poor air circulation. These manifest as white powdery coating or gray fuzzy growth on leaves and stems. Improve air circulation by proper spacing, avoid overhead watering, and remove affected plant parts promptly. Organic fungicides containing sulfur or neem oil help control outbreaks.
**Aphids** occasionally infest thyme, clustering on tender new growth and stem tips. These small, soft-bodied insects suck plant sap, causing distorted growth and potentially transmitting diseases. A strong spray of water dislodges light infestations. For persistent problems, insecticidal soap or neem oil provides effective organic control. Encouraging beneficial insects like ladybugs and lacewings offers natural pest management.
**Spider mites** may appear during hot, dry conditions, causing stippled, yellowed leaves and fine webbing. Increase humidity around plants, spray with water regularly, and apply insecticidal soap or neem oil for severe infestations.
Thrips
create silvery streaks on leaves and can be controlled with similar methods.Environmental stress from extreme heat, cold, or improper growing conditions causes various symptoms including leaf drop, stunted growth, and discoloration. Identifying and correcting the underlying environmental issue resolves these problems. Providing appropriate sun exposure, proper soil conditions, and adequate but not excessive water prevents most stress-related issues.
Container Growing Tips
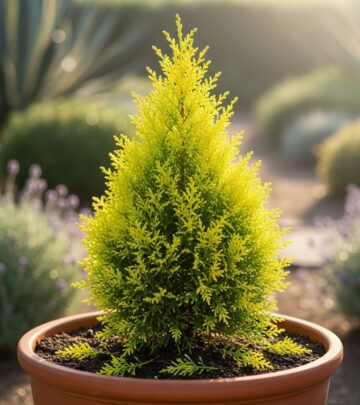
Container cultivation suits thyme exceptionally well, making this herb accessible to gardeners without traditional garden space.
Select containers at least 6 to 8 inches deep
with adequate drainage holes. Terra cotta pots work particularly well for thyme, as their porous nature promotes air circulation and prevents water retention. Plastic and glazed ceramic containers also work but require more careful watering management.Use a well-draining potting mix specifically formulated for herbs or create your own by mixing standard potting soil with perlite, coarse sand, or small gravel. Avoid garden soil in containers, as it compacts and drains poorly. Place containers in locations receiving full sun—south-facing spots work best in most climates. Rotate containers periodically to ensure even light exposure on all sides.
Container-grown thyme requires more frequent monitoring than garden plants. Check soil moisture regularly, especially during hot weather, but maintain the dry-between-waterings approach thyme prefers. Feed monthly during the growing season with diluted liquid fertilizer. As plants become root-bound after a year or two, transplant to larger containers or divide and repot in fresh soil.
For
indoor growing
, place containers in the sunniest available location, ideally a south-facing window. Supplemental grow lights may be necessary to provide sufficient light intensity, especially during shorter winter days. Indoor plants benefit from occasional outdoor time in mild weather to strengthen growth and receive natural light.Companion Planting
Thyme serves as an excellent companion plant in both herb and vegetable gardens. Its strong aroma helps
deter various pests including cabbage worms, whiteflies, and tomato hornworms
, making it valuable near susceptible crops. Plant thyme near cabbage family members, tomatoes, eggplants, and strawberries for natural pest protection.The herb’s low-growing habit and shallow root system make it compatible with taller plants, allowing efficient use of garden space. Thyme pairs well with other Mediterranean herbs sharing similar cultural requirements—rosemary, lavender, oregano, and sage make excellent companions. These combinations create attractive, low-maintenance herb gardens with compatible watering and fertilization needs.
Thyme’s flowers attract numerous beneficial insects including bees, butterflies, and predatory wasps, enhancing pollination and natural pest control throughout the garden. Planting thyme along garden borders or paths serves multiple purposes: defining spaces, providing easy harvest access, and creating aromatic walkways that release fragrance when brushed.
Using Thyme in the Kitchen
Beyond its gardening appeal, thyme’s culinary versatility makes it indispensable in kitchens worldwide. The herb’s earthy, slightly minty flavor with subtle lemon notes complements an enormous range of dishes.
Fresh thyme
works beautifully in lighter applications where its bright flavor shines—sprinkled over roasted vegetables, mixed into salad dressings, or added to marinades for poultry and fish.**Dried thyme** provides more concentrated flavor suitable for longer-cooking dishes. Add it to soups, stews, braises, and tomato sauces where extended cooking time releases and melds its complex flavors. The herb pairs exceptionally well with roasted meats, particularly lamb, chicken, and pork. It’s essential in stocks and broths, contributing depth and aromatic complexity.
Thyme forms a key component of several classic herb blends. Herbes de Provence combines thyme with rosemary, oregano, marjoram, and lavender. Bouquet garni traditionally includes thyme, parsley, and bay leaf tied together for easy removal after flavoring dishes. These blends showcase thyme’s ability to harmonize with other herbs while contributing its distinctive character.
The edible flowers add delicate flavor and visual appeal to salads, compound butters, and garnishes. Strip fresh leaves from stems by running fingers down the stem from top to bottom—the small leaves release easily with this technique. When substituting dried for fresh, use one-third the amount, as drying concentrates flavors significantly.
Medicinal and Other Uses
Beyond culinary applications, thyme has been valued for medicinal purposes for thousands of years. The herb contains compounds like thymol and carvacrol that possess
antimicrobial, antifungal, and antioxidant properties
. Traditional herbalism uses thyme for respiratory complaints, digestive issues, and as a general immune system support.Thyme tea, made by steeping fresh or dried leaves in hot water, soothes sore throats and coughs while providing warming comfort. The herb’s expectorant properties help clear congestion. Thyme essential oil, though requiring careful dilution and use, finds applications in aromatherapy and natural cleaning products. Always consult healthcare professionals before using herbs medicinally, especially in concentrated forms.
The plant’s strong scent makes it useful in natural pest control, sachets, and potpourris. Dried thyme tucked into closets and drawers helps repel moths and other insects. The herb also appears in natural beauty products, soaps, and lotions for its aromatic qualities and skin benefits.
Frequently Asked Questions
Q: How long does thyme take to grow from seed?
A: Thyme seeds typically germinate in 10-15 days under optimal conditions. Plants reach harvestable size approximately three months after planting, though small harvests can begin earlier once plants establish vigorous growth.
Q: Can thyme survive winter outdoors?
A: Yes, thyme is perennial in USDA zones 5-9 and survives winter outdoors in these regions. In colder zones, provide mulch protection or grow as an annual. Container plants can be brought indoors during harsh winter weather.
Q: Why is my thyme plant turning brown?
A: Brown thyme typically indicates overwatering, root rot, or fungal disease. Check soil drainage, reduce watering frequency, and ensure plants receive adequate air circulation. Remove affected portions and improve growing conditions.
Q: How often should I water thyme?
A: Water thyme deeply but infrequently, allowing the top 1-2 inches of soil to dry completely between waterings. Established plants are drought-tolerant and often thrive on natural rainfall alone, requiring supplemental water only during extended dry periods.
Q: Can I grow thyme indoors year-round?
A: Yes, thyme grows successfully indoors with proper conditions. Provide at least 6-8 hours of direct sunlight or use supplemental grow lights. Ensure good air circulation and avoid overwatering, as indoor conditions can retain more moisture.
Q: When is the best time to harvest thyme for maximum flavor?
A: For large harvests, the optimal time is mid-spring to early summer just before flower buds develop, when essential oil concentration peaks. For ongoing fresh use, harvest small amounts anytime throughout the growing season.
Q: How do I prevent my thyme from becoming woody?
A: Regular harvesting and pruning throughout the growing season prevents excessive woody growth. Trim plants consistently, removing up to one-third of the height at a time, and perform rejuvenating pruning in early spring before new growth begins.
Q: What should I do with thyme flowers?
A: Thyme flowers are edible and attract beneficial pollinators. You can leave them for wildlife value or deadhead after blooming to redirect energy into foliage production. Harvest flowers along with leaves for added flavor and visual appeal in dishes.
Similar Articles


Read full bio of Sneha Tete