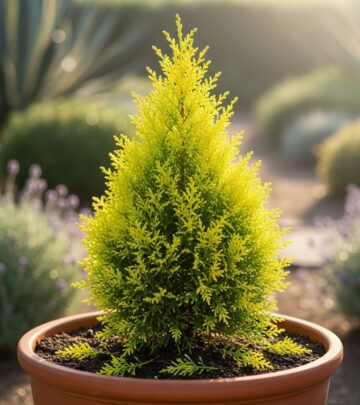
Leek Microgreens: Complete Growing Guide for Beginners
Discover how to grow flavorful leek microgreens at home with this comprehensive step-by-step guide

Leek microgreens represent one of the most flavorful and nutritious additions you can make to your microgreens garden. These tender young shoots deliver an intense yet delicate onion-like flavor that elevates salads, sandwiches, and countless dishes. Growing leek microgreens at home is remarkably straightforward, requiring minimal space and equipment while providing a continuous harvest of fresh, nutrient-dense greens in just a couple of weeks.
Whether you’re a seasoned microgreens grower or just beginning your journey into indoor gardening, leek microgreens offer an excellent growing experience. They’re relatively forgiving compared to other varieties, germinate reliably, and produce impressive yields. This comprehensive guide will walk you through everything you need to know about cultivating these delicious microgreens from seed to harvest.
What Are Leek Microgreens
Leek microgreens are the young seedlings of the leek plant, harvested just after the first true leaves have developed. Unlike mature leeks that require months to develop their characteristic thick white stalks, microgreens are ready to harvest in approximately 10-14 days. These young greens capture the essence of the full-grown leek’s flavor profile in a more concentrated, delicate form.
Belonging to the Alliaceae family, leek microgreens share lineage with onions, garlic, and chives. They originate from the Eastern Mediterranean region where leeks have been cultivated for thousands of years. When grown as microgreens, these plants produce slender, grass-like shoots with a mild yet distinctive flavor that’s less pungent than mature leeks but more complex than standard lettuce microgreens.
The visual appeal of leek microgreens adds to their culinary value. They typically display vibrant green stems and leaves that stand upright in dense clusters, creating an attractive presentation on any plate. The texture is tender and crisp, making them versatile for both raw and lightly cooked applications.
Nutritional Benefits and Health Properties
Leek microgreens pack an impressive nutritional punch despite their diminutive size. Like most microgreens, they contain significantly higher concentrations of vitamins, minerals, and beneficial plant compounds compared to their mature counterparts. This nutritional density makes them an exceptional addition to health-conscious diets.
These microgreens are particularly rich in vitamin K, which plays a crucial role in blood clotting and bone health. They also provide substantial amounts of vitamin C, supporting immune function and acting as a powerful antioxidant. The presence of folate makes them beneficial for cellular function and tissue growth, while their vitamin A content supports vision and immune health.
Beyond vitamins, leek microgreens contain important minerals including iron, manganese, and copper. The allium compounds present in these greens, inherited from their family lineage, offer potential cardiovascular benefits and antimicrobial properties. Regular consumption of leek microgreens may contribute to reduced inflammation and improved overall wellness.
Materials and Supplies Needed
Starting your leek microgreens garden requires relatively minimal investment in materials and supplies. The beauty of microgreens cultivation lies in its simplicity and accessibility, making it perfect for urban gardeners, apartment dwellers, or anyone with limited outdoor space.
Growing Trays: You’ll need shallow growing trays, typically 1-2 inches deep. Standard 10×20 inch trays work excellently for home cultivation. Consider purchasing trays with drainage holes, or if using solid trays, be prepared to manage moisture levels carefully to prevent waterlogging.
Growing Medium: Several options work well for leek microgreens. A fine-grained potting soil mix provides excellent results and contains some nutrients to support growth. Coconut coir, either in brick form or pre-hydrated, offers a sustainable alternative with good water retention properties. Some growers prefer hydroponic mats or hemp mats for easier cleanup and potentially faster growth.
Seeds: Source high-quality leek seeds specifically intended for microgreens or sprouting. Standard garden variety seeds work, but microgreen-specific seeds often have higher germination rates and are tested for pathogens. Plan on using approximately 1-2 ounces of seeds per standard 10×20 inch tray for optimal density.
Lighting: While leek microgreens can grow in a sunny windowsill, supplemental lighting ensures more consistent and robust growth. LED grow lights or fluorescent fixtures positioned 4-6 inches above the growing surface provide ideal conditions. Natural sunlight works but may result in more variable growth patterns.
Water and Misting Equipment: A spray bottle or misting device helps maintain proper moisture levels during germination without disturbing seeds. Once established, bottom watering or gentle top watering works well.
Step-by-Step Growing Process
Seed Preparation and Soaking
Unlike some microgreens that can be planted directly, leek seeds benefit significantly from a pre-soaking period. This crucial step jumpstarts the germination process and typically results in more uniform sprouting across your growing tray.
Begin by measuring out your desired quantity of leek seeds. For a standard 10×20 inch tray, use approximately 1-2 ounces of seeds depending on how densely you want your final crop. Place the seeds in a clean container and cover them with room-temperature water. The water level should be about two to three times the volume of seeds, as they’ll absorb significant moisture and expand during soaking.
Allow the seeds to soak for 6-8 hours. During this period, you can rinse the seeds once or twice to prevent fermentation, though this is less critical for leek seeds compared to larger seeds like peas. After soaking, drain the seeds thoroughly and let them sit for a few minutes to remove excess surface moisture before planting.
Preparing Your Growing Medium
The foundation of successful leek microgreens cultivation starts with properly prepared growing medium. Whether you’re using soil, coconut coir, or hydroponic mats, the setup process significantly impacts your final results.
If using potting soil, fill your growing tray to within half an inch of the top. This spacing is crucial—it allows the growing microgreens adequate room while preventing seeds from spilling over the edges. Gently press and level the soil surface to create a uniform planting bed. The soil should be moist but not waterlogged; aim for the consistency of a wrung-out sponge.
For coconut coir, if you’re using compressed bricks, hydrate them according to package instructions. Once expanded, break apart any large clumps and spread evenly in your tray. Coconut coir typically requires more frequent watering than soil but provides excellent aeration for developing roots.
Regardless of your chosen medium, ensure the surface is level and smooth. Any dips or hills will result in uneven moisture distribution and inconsistent growth patterns across your crop.
Planting and Initial Care
Planting leek microgreens differs fundamentally from traditional gardening—these seeds aren’t buried but rather placed directly on the growing medium surface. This technique, used for most microgreens, allows for denser planting and easier germination monitoring.
Distribute your pre-soaked leek seeds evenly across the prepared growing medium surface. Aim for dense but single-layer coverage, with seeds nearly touching but not piled on top of each other. This density maximizes yield while preventing mold issues that can arise from overcrowding. Gently press the seeds into the surface to ensure good contact with the moisture below.
After seeding, mist the surface thoroughly with water. The seeds should be visibly moist but not swimming. At this stage, covering your tray helps maintain humidity and darkness, which many seeds prefer during initial germination. You can use another tray flipped upside down, a humidity dome, or even a sheet of plastic wrap with a few holes for air circulation.
Place your covered tray in a warm location, ideally between 60-75°F. Avoid direct sunlight during this germination phase. Check daily to ensure the growing medium remains moist, misting as needed. The cover creates a microclimate that speeds germination while preventing the surface from drying out.
The Germination Phase
The germination phase represents a critical period in your leek microgreens journey. During these first several days, the magic of transformation occurs as dormant seeds awaken and begin their rapid growth cycle.
Within 2-4 days, you should notice the first signs of germination. Small white root tips will emerge from the seeds, searching for the growing medium below. Shortly after, pale shoots begin pushing upward. At this stage, the seedlings remain under cover, growing in darkness, which encourages strong stem development.
Continue monitoring moisture levels carefully during germination. The growing medium should never dry out completely, as this can halt germination or kill emerging seedlings. However, excessive moisture creates conditions favorable for mold growth. Strike a balance by misting when the surface appears dry but before the medium below loses its moisture.
Around day 3-5, your leek microgreens will have developed small shoots pushing against the cover. This signals the time to remove the covering and introduce light. When you first uncover the tray, the shoots will appear pale yellow or white—this is perfectly normal. They haven’t yet produced chlorophyll, which requires light exposure.
Growth and Light Requirements
Once uncovered, leek microgreens enter their most dramatic growth phase. The introduction of light triggers chlorophyll production, transforming pale shoots into vibrant green plants over the course of just 24-48 hours.
Position your tray under grow lights or in a location receiving indirect bright light for 12-16 hours daily. Direct, intense sunlight can be too harsh for young microgreens, potentially causing them to dry out or become stressed. If using artificial lighting, maintain a distance of 4-6 inches between the light source and the top of the microgreens. LED grow lights work exceptionally well, offering full-spectrum light while generating minimal heat.
During this growth phase, your leek microgreens will stretch upward, developing their characteristic grass-like appearance. The stems strengthen and the first true leaves emerge and unfold. This transformation happens remarkably quickly—you’ll notice visible changes in growth each day.
Adjust your watering routine as the microgreens develop. Once they’ve established a root system, you can transition from top misting to bottom watering. This method involves pouring water into a secondary tray and placing your growing tray (with drainage holes) inside it. The roots draw water upward through the growing medium, keeping foliage dry and reducing the risk of mold or fungal issues.
Watering and Maintenance
Proper watering technique can make the difference between a bountiful harvest and disappointing results. Leek microgreens require consistent moisture but are susceptible to problems associated with both underwatering and overwatering.
As mentioned, bottom watering provides the most reliable results once your microgreens are established. Check moisture levels daily by feeling the growing medium—it should remain consistently moist but never soggy. If you notice water pooling on the surface or the medium feels waterlogged, you’re providing too much moisture. Conversely, if the plants appear wilted or the growing medium pulls away from the tray edges, increase watering frequency.
Watch for signs of potential problems during the growing phase. Mold or fuzzy white growth typically indicates excessive moisture combined with poor air circulation. If caught early, improving airflow and reducing moisture can reverse the issue. Yellowing or browning leaf tips might suggest nutrient deficiency, though this is uncommon in microgreens harvested young. Leggy, weak stems often result from insufficient light or growing the crop in temperatures too warm.
Maintain good air circulation around your growing trays. A small fan on a low setting, positioned to create gentle air movement without directly blasting the microgreens, helps prevent fungal issues and strengthens stems through the slight stress of movement.
Harvesting Your Leek Microgreens
The anticipation builds as your leek microgreens approach harvest readiness. Knowing the optimal harvest time and technique ensures you capture peak flavor and nutritional value while maximizing your yield.
Leek microgreens reach harvest stage approximately 10-14 days after planting, though timing varies based on growing conditions. The ideal harvest window occurs when the plants have developed their first true leaves beyond the initial cotyledon leaves. At this stage, they typically stand 2-4 inches tall with vibrant green coloration throughout.
To harvest, use clean, sharp scissors or a knife. Grasp a small bunch of microgreens gently and cut just above the growing medium surface. Work your way systematically across the tray, cutting small sections at a time. This method provides more control and cleaner cuts compared to attempting to harvest the entire tray at once.
Some growers prefer to harvest leek microgreens when slightly younger and more tender, around the 10-12 day mark, while others wait until day 14 for more developed flavor. Taste-test a few shoots as they develop to determine your personal preference. The flavor intensifies slightly as they mature, becoming more distinctly leek-like.
After harvesting, inspect your microgreens and remove any seed hulls or growing medium that may have adhered to the stems. A gentle rinse isn’t necessary if you’ve maintained clean growing practices, though some prefer to lightly rinse their harvest. If rinsing, use cold water and spin or pat the microgreens dry immediately to prevent spoilage.
Storage and Preservation
Proper post-harvest handling extends the shelf life of your leek microgreens, allowing you to enjoy your harvest over several days. Fresh microgreens are delicate and require careful storage to maintain their crisp texture and vibrant flavor.
Store harvested leek microgreens in an airtight container in the refrigerator. A clamshell container or sealed plastic container works excellently. Before sealing, ensure the microgreens are as dry as possible—excess moisture accelerates decay. Placing a paper towel in the container can absorb any residual moisture and extend freshness.
Under optimal storage conditions, leek microgreens typically remain fresh for 5-7 days after harvest. Check them daily and remove any shoots that show signs of deterioration to prevent spoilage from spreading. The texture and flavor are best within the first 3-4 days, so plan your harvests accordingly if you want to maintain a continuous supply.
For the freshest taste and maximum nutritional benefit, consider staggered plantings. By starting a new tray every 3-4 days, you create a rotation that ensures constant availability of peak-quality microgreens. This approach requires more growing space but eliminates the need for extended storage.
Culinary Uses and Recipe Ideas
Leek microgreens bring sophisticated flavor to countless dishes, punching far above their weight in culinary impact. Their mild onion taste with subtle sweet undertones complements rather than overpowers, making them incredibly versatile in the kitchen.
Use leek microgreens as a garnish for soups and stews, where their delicate flavor echoes the taste of traditional leek additions while adding visual appeal and textural contrast. They work beautifully sprinkled over cream-based soups, adding a fresh element to rich dishes. Potato leek soup benefits particularly from a generous topping of fresh leek microgreens just before serving.
In salads and sandwiches, leek microgreens provide mild onion flavor without the harsh bite of raw onions. Combine them with other microgreens varieties for textural and flavor diversity, or use them as a primary component in a simple salad with light vinaigrette. Their tender texture means they work equally well in delicate spring mix salads or heartier grain-based bowls.
Consider incorporating leek microgreens into egg dishes—omelets, frittatas, and scrambled eggs all benefit from their addition. Add them at the last moment of cooking or use as a fresh garnish to preserve their delicate texture and bright flavor. They pair exceptionally well with cream cheese and smoked salmon in breakfast dishes or appetizers.
For more adventurous applications, try blending leek microgreens into compound butters or pesto-style spreads. The mild onion flavor infuses beautifully into fats, creating sophisticated condiments perfect for finishing grilled meats or spreading on artisan breads. They also work well as a pizza topping added after baking, providing fresh contrast to rich, cooked flavors.
Troubleshooting Common Issues
Even with careful attention, challenges can arise when growing leek microgreens. Understanding common problems and their solutions helps you maintain successful harvests and improve your technique over time.
Poor Germination: If your seeds fail to sprout uniformly or germination rates are low, several factors could be responsible. Old seeds lose viability over time—always check expiration dates and store unused seeds properly in cool, dry conditions. Insufficient moisture during germination prevents seeds from activating, while too much moisture can cause them to rot. Temperature also plays a role; if your growing area is too cool (below 60°F), germination slows significantly or stops entirely.
Mold Growth: White, fuzzy growth on your growing medium or microgreens indicates mold problems, though sometimes new growers mistake root hairs for mold. Root hairs appear as fine white structures emerging from roots and disappear with water exposure, while mold persists. True mold typically results from excessive moisture, poor air circulation, or contaminated seeds or growing medium. Improve airflow, reduce watering frequency, and consider using a small fan to keep air moving gently across your trays.
Leggy or Weak Stems: Tall, spindly microgreens that fall over easily suggest insufficient light. Increase light intensity or duration, and ensure your light source is positioned close enough to the growing surface. Alternatively, temperatures that are too warm can cause excessive stretching as plants grow rapidly without developing sturdy structure.
Yellowing or Discolored Leaves: If your leek microgreens develop yellow leaves or brown tips, the issue might be nutrient-related, though this is unusual in microgreens harvested young. More commonly, discoloration indicates light problems—too much direct, intense light can bleach or burn young leaves, while insufficient light prevents proper chlorophyll development. Adjust lighting conditions accordingly.
Growing Leek Microgreens Compared to Other Alliums
Understanding how leek microgreens compare to their allium relatives helps you make informed decisions about which varieties to grow and what to expect from each.
Leek microgreens offer a milder, sweeter flavor compared to onion microgreens, which can be quite pungent. This makes them more versatile in dishes where you want allium flavor without overwhelming intensity. Chive microgreens present a similar use case to leeks but with a slightly more distinct onion bite, while garlic microgreens deliver unmistakable garlic essence that can dominate a dish.
In terms of growth characteristics, leeks germinate reliably and grow at a moderate pace, typically ready for harvest in 10-14 days. Onion microgreens follow a similar timeline, while chives tend to grow more slowly and may take up to 21 days to reach harvest stage. Garlic microgreens can be somewhat finicky, requiring careful moisture management and often benefiting from seed soaking.
The appearance of leek microgreens—slender, grass-like shoots standing upright—closely resembles other allium microgreens, though subtle differences in leaf shape and color intensity exist. This visual similarity means they can often substitute for one another in garnishing applications, with flavor being the primary differentiating factor.
Frequently Asked Questions
Q: How long does it take to grow leek microgreens from seed to harvest?
A: Leek microgreens typically take 10-14 days from planting to harvest. The exact timing depends on growing conditions such as temperature, light intensity, and moisture levels. You can harvest them slightly earlier for more tender greens or wait a bit longer for stronger leek flavor.
Q: Do I need to soak leek seeds before planting?
A: Yes, soaking leek seeds for 6-8 hours before planting significantly improves germination rates and results in more uniform sprouting. Drain the seeds thoroughly after soaking and before spreading them on your growing medium.
Q: Can leek microgreens be regrown after cutting?
A: No, leek microgreens cannot be regrown after harvesting. Unlike some plants that regrow from cut stems, microgreens are harvested by cutting above the root, and the remaining plant material typically won’t produce a second crop. Plan for continuous harvests by starting new trays every few days.
Q: What’s the best growing medium for leek microgreens?
A: Leek microgreens grow well in several mediums including potting soil, coconut coir, or hydroponic mats. Potting soil provides some nutrients and good water retention, while coconut coir offers excellent aeration. Choose based on your preference and what’s readily available, ensuring the medium is fine-grained and free of large particles.
Q: Why are my leek microgreens falling over or growing leggy?
A: Leggy, weak growth typically indicates insufficient light. Increase light intensity or duration, positioning grow lights 4-6 inches above your trays for 12-16 hours daily. Sometimes excessive warmth combined with low light causes this issue, so ensure your growing area maintains appropriate temperature ranges.
Q: How should I store harvested leek microgreens?
A: Store leek microgreens in an airtight container in the refrigerator, ensuring they’re as dry as possible before sealing. Adding a paper towel to absorb excess moisture helps extend freshness. Properly stored leek microgreens remain fresh for 5-7 days, though flavor and texture are best within the first 3-4 days.
Q: Can I grow leek microgreens without grow lights?
A: Yes, you can grow leek microgreens in a sunny windowsill, though results may be less consistent than with supplemental lighting. Choose a south-facing window with bright, indirect light, and rotate trays regularly for even growth. Grow lights provide more control and reliability, especially in climates with limited natural light.
Q: What’s the difference between leek microgreens and leek sprouts?
A: Leek microgreens are grown in soil or growing medium and harvested after developing their first true leaves, taking 10-14 days. Sprouts are grown in water, harvested much earlier (within 3-5 days), and consumed entirely including roots and seed. Microgreens offer more developed flavor and higher nutrient concentration.
Similar Articles


Read full bio of Sneha Tete